Using Odds and Ends

Hi friends. I am back with another spring themed card. I had a couple of backgrounds on my desk. Well, actually I have a pile of them, but I regress. I don’t know about you, but there are many times that I set out to create a background and for whatever reason it doesn’t work out for the card I am making. Of course, I don’t throw these backgrounds out, I set them aside for later. Here’s a look at two backgrounds, created for two different projects, that I will use on my card today.

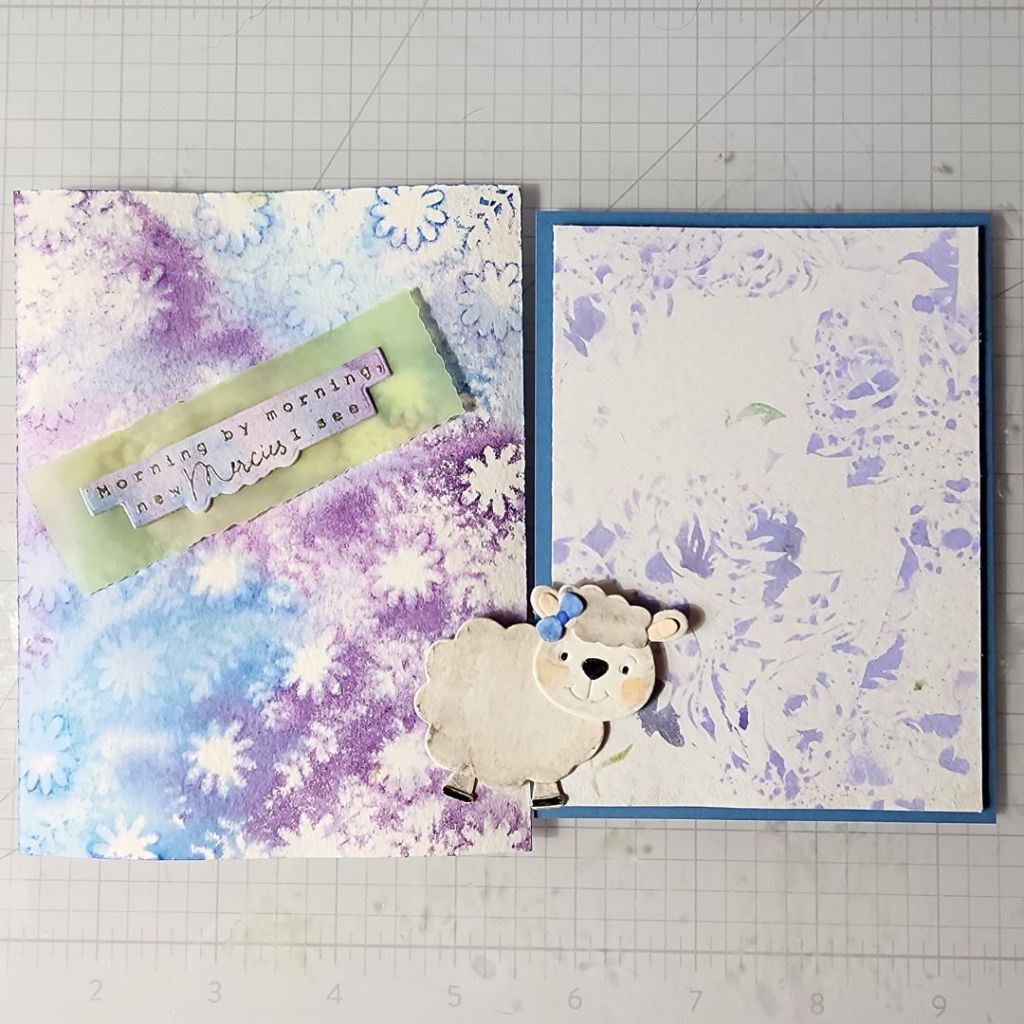
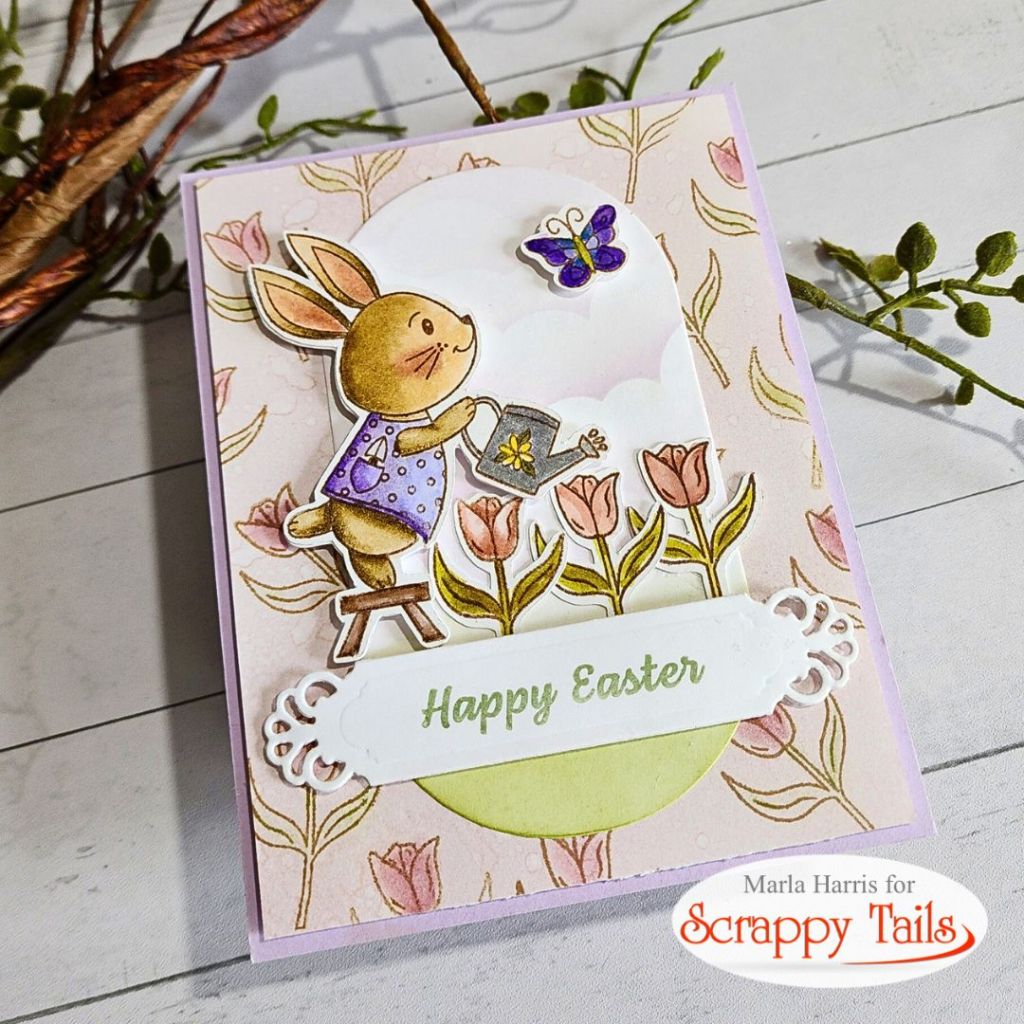
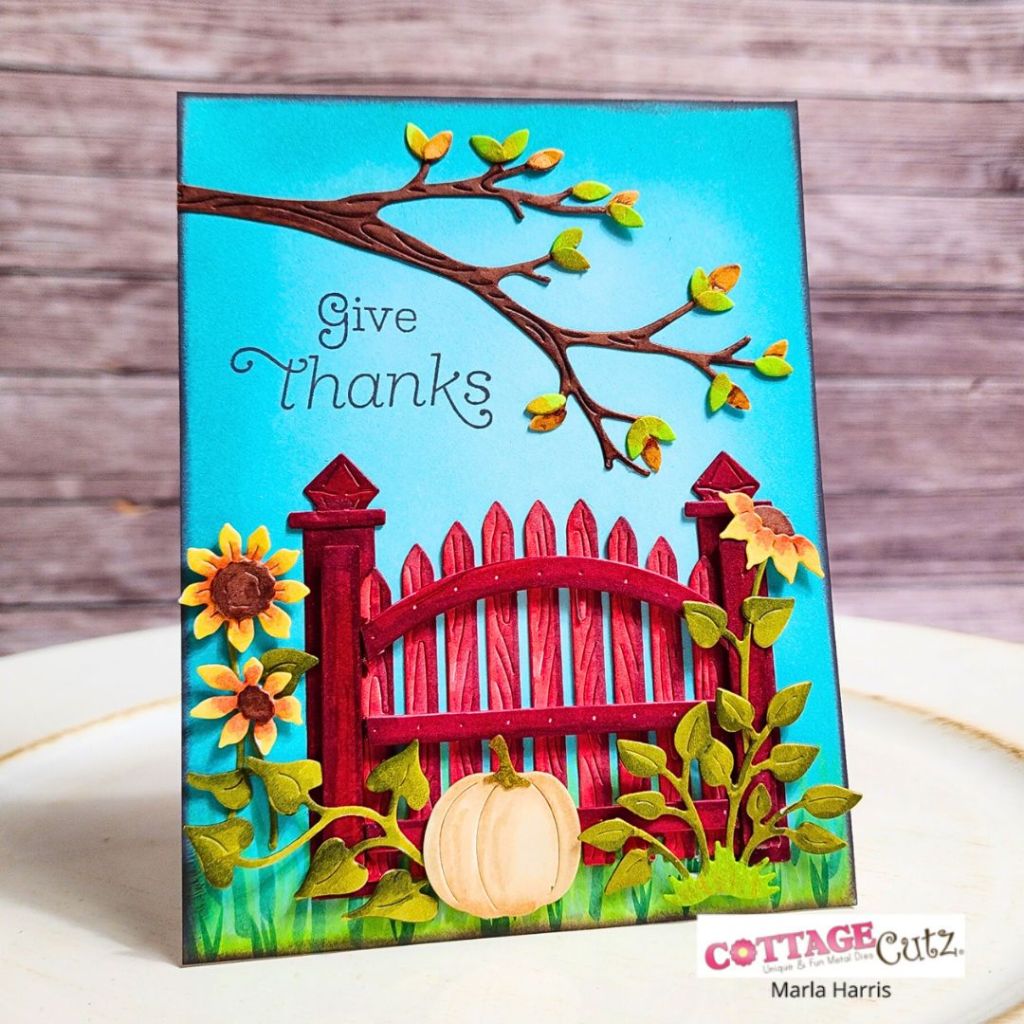
As you can see, these coordinated perfectly and ended up being the jumping off point for my card. I had several CottageCutz dies, sitting on my desk, to consider for future projects. I looked through them and settled on using the “Spring Tulips” and “Spring Sheep” dies. I envisioned a split scene for my design and thought they complimented each other.

After die cutting my images, I watercolored them using the Tim Holtz Distress Watercolor pencils. I had created my background with his Distress Inks, so I knew the watercolored images would complement my backgrounds. For the larger tulips I used “Kitsch Flamingo” and “Shaded Lilac”. On the sheep, I used “Hickory Smoke” “Shaded Lilac” and “Tattered Rose”. I added “Rustic Wilderness” and “Twisted Citron” to the large tulip leaves and the same colors with a touch of “Cracked Pistachio” to the grass. Finally, for my small tulips I used “Cracked Pistachio” and “Seedless Preserves”.

After assembling the die cuts, the card came together quickly.  I cut one of my background panels down to 3.5″ x 4.75″ and used a piece of blue cardstock cut to 3.75″ x 5″ to use as a mat. Next, I added foam tape to the back and adhered it to my second background, which had been adhered to a 4.25″ x 5.5″ card base. Again, I had the sentiment already stamped and die cut along with the green vellum that I had trimmed, using the Deckled Edge Trimmer from Tim Holtz, so I attached those pieces to the center of my top panel and then built my split scene around the sentiment. Finally, I covered the vellum and sheep and splattered the panel with a “Picket Fence” Distress paint to complete the card.

Thanks for stopping by today. Until next time…. XOXO Marla

An Early Easter

We’ve just moved through the Christmas season and whoa, we’re celebrating Easter? How does that happen? Well, Easter arrives early this year. March 31st to be exact. This means it’s time to get hoppin’ (pun intended) on our Easter cards. The Scrappy Tails Crafts “Easter Blessings” release is jam packed with amazing stamps, dies and stencils for both St. Patty’s Day and Easter to get your creative juices flowing. Being the bunny lover that I am I couldn’t resist the “Carrot Patch Bunnies” stamp set. Which leads me to my card today, let’s get started.

I started with a piece of white cardstock cut to 4 x 5.25″ and stamped the single tulip, multiple times, with “Coffee” Archival ink to create a custom spring background. I used “Tattered Rose and Peeled Paint” Distress Inks to lightly color in the tulips with a small blending brush and then blended “Milled Lavendar” Distress Ink over the top of the panel. Next, I spritzed the panel with water and let it dry. I used an elongated oval die to cut a focal point for my scene and inked on “Peeled Paint” for the illusion of grass and used a cloud stencil and “Milled Lavendar” for my sky. Next, I cut a lavender piece of cardstock to 4.25″ x 5.5″ inches. I layered all three pieces on to an A2 card base, adding foam tape to the back of the tulip panel for dimension.

I had previously stamped several images from the “Carrot Patch Bunnies” stamp set using “”Coffee” Archival ink and colored the images using my Zig Clean Color Real Brush Pens. I will be sharing the coloring process in a video soon, if you’re interested in seeing that. 

I didn’t have the dies, so I used my Brother Scan n Cut to cut out my images. I added foam tape behind the bunny and butterfly and then stamped my sentiment on a fancy die cut sentiment strip. I added foam tape behind the sentiment and adhered the images to complete my scene.

I should mention that I created this card as part of the Scrappy Tails Easter Blessings Instagram hop. Scrappy Tails is giving away two $25 gift cards to their store. How amazing would that be to win? To qualify you must hop along and leave a comment on each of the posts by February 1st. The winners will be selected on February 2nd and announced on the Scrappy Tails Crafts Instagram page. Here are the links to the hop.

Scrappy Tails- @Scrappytailscrafts

Emelie Genberg- @scrapbooking_swe  

Marla Harris- @madaboutcardsandcrafts

Silvia Galloni- @sivg76

Emily Mydlowski- @popsofpaper

Traci Jenkins- @tjcarddesigns

Larissa Heskett- @larissaheskettdesigns

Debbie Jenkins- @debbiejscraftingcorner

 Brian Dickey- @bdcraftsmore

Brenda Noelke- @mypapercutcreations

Sharon Luska- @sharonluska

Waleska Galindo- @craftinglovew

Desiree K- @includethankyou

Estelle Palumbo- @atouscrap

Thank you for stopping by today and don’t forget to keep an eye out for my next video, coming soon. Until next time…. XOXO Marla

“Wood You Be Mine”

Happy New Year, friends. I thought I would pop on here with a quick share. The new year is upon us, and new goals and resolutions have been set. It’s time to start fresh. My reset this year is in a simple word and that is “action”. It can look different each day and instead of pigeonholing myself, I am finding grace in the restart of each day instead of the year. I talk constantly about unused stamps and dies, and today’s card features one set from 2023’s Lawn Fawn Valentine’s release, it’s called “Wood You Be Mine” that was left unopened. So, here we are with a card utilizing my never-ending manta to use what I have and take “action.”

I started by stamping out my images onto Copic Xpress It paper using Memento “Cocoa” ink. Then, I cut out the images with my Scan n Cut machine.

I wanted a card that wasn’t the traditional red, pink and white, so I utilized a couple of unused Tim Holtz products from my stash to give the card a rugged appeal. The embossing folder is called “Tree Ring” and is a 3D folder that was inked with “Ground Espresso” Distress Ink before running it through my machine. Then I added a little “Gathered Twigs” to the embossed panel and blended more “Ground Espresso” around the panel. Then I pulled out some cream cardstock and cut two labels using the “Vintage Labels” set. What is unique about these dies is that you can ink the raised areas and it will depress the ink into your design while cutting. I used “Forest Moss” Distress ink to add the green.

I cut two pieces of cardstock, the first was “Pomegranate” from Spellbinders and I adhered it to an A2 top folding card base. The green cardstock is “Ripe Avocado” from Papertrey Ink. I added a little “Forest Moss” Distress Ink to the edges and foam tape for depth and dimension to the back. Then, I added the embossed piece to the top before adhering the layers to my card base. Next, I added my images to the largest label adding foam tape on the beavers. I inserted two brads on my sentiment and wrapped a little twine around both brads for interest. I added foam tape behind the sentiment before adhering both labels to the embossed layer to finish the card.

Thank you for stopping by. I want to wish you all a happy and healthy new year and I look forward to spending more time together here on my blog and YouTube Channel. Until next time…. XOXO Marla

SUPPLIES USED:

***Lawn Fawn Wood You Be Mine

ScrapbookPal https://shrsl.com/4d7e8

Simon Says Stamp https://shrsl.com/4d7e7

Scrapbook.com https://shrsl.com/4d7eb

***Tim Holtz Sizzix Vintage Labels

ScrapbookPal https://shrsl.com/4d7e9

Simon Says Stamp https://shrsl.com/4d7dy

Scrapbook.com https://shrsl.com/4d7ec

***Tim Holtz Sizzix Tree Rings 3D Texture Fade Embossing Folder

Simon Says Stamp https://shrsl.com/4d7e1

“Let it Snow”

Happy Monday, friends. Christmas is one week away. The season always flies by and each year no matter how early I start something gets in the way, and I am once again behind in preparations. This year, it was illness that got in the way. I have been down with a terrible cold, which means I’ve not been able to do my usual baking for my neighbors’ gifts. Sigh. Since I can’t bake, I really wanted to get back in the craft room. For inspiration, I checked out the Simon Says Stamp Monday Challenge again to see what the theme was and it’s “Let it Snow.” Crafting is something I can do, so I pulled out a few more unused products and went straight to work.

I felt like I wanted to go grungy today so I decided to create a thank you card that I can send after the holidays. I used a piece of Canson XL watercolor paper and chose a few Ranger sprays to help me start my background. I used “Frayed Burlap” Distress Oxide Spray, “Bundled Sage” Distress Spray Stain and added a touch of “Crooked Broomstick” Mica Spray Stain and some water. Then I dried the panel and added splatters of water for texture.

To add my snowflakes, I used my “Snowflake Print” stencil from The Greetery and Distress Inks in “Unchartered Mariner” and “Wilted Violet”. Then, I spritzed water over the stencil and dried the panel. Next, I used the Simon Says Stamp “Soft Snowfall” embossing folder for additional texture. Using a sanding block, I sanded off the color and added Nuvo “Fresh Snowfall” Glitter Accents to add sparkle. I completed the background using Lawn Fawn’s “Gold” stencil paste and a palette knife to add a rough texture of gold snow.

Moving on to my trees, I used the “Snowflake Print” stencil again and added “Frayed Burlap” Distress Oxide ink and “Gathered Twigs” Distress Ink on vanilla cardstock. I cut my trees using Tim Holtz “Trim a Tree Colorized” die. Then, I inked the edge of each of the layers using “Vintage Photo” Distress Ink and assembled all three trees.

To complete my card, I cut a moon using Tim Holtz “Moonlight” die I cut the bottom layer from gold glitter cardstock and the top layer from gold foil cardstock. After adhered both layers together I added the moon to my panel and cut it down to 4″ x 5.25″. I adhered the finished panel to an A2 top folding card base that I added a piece of dark taupe cardstock to. I attached the trees and used foam tape to the tree in the forefront and to the “thank you” sentiment to complete the card.

I love the texture and grunge that this card has. I hope you do to. Until next time….XOXO Marla

Simon Says Stamp “Walter the Penguin”

Hello, friends. I have been in a crafty funk. Shall I make you gasp? I’ve been in full blown deep cleaning mode instead. Crazy, right? I really wanted to get inside my craft room, but I just wasn’t feeling it. Finally, I perused Instagram and found three current challenges that I thought would get me out of my crafting funk. The first was The Color Throwdown Challenge (Cobalt Blue, Aqua Blue and Gold) #CCT772 #colorthrowdown. The second was the Simon Says Stamp Monday Challenge (Winter Blues). Both Challenges were incorporating the color blue, so blue it was. The third is the Simon Says Stamp Instagram Challenge, which is to “Delightful Die Cutting”. I had a few new products I had purchased from Simon Says Stamp on my desk, so I rolled up my sleeves and began to imagine how they could be used for these challenges.

I started with a piece white glossy cardstock that was cut to 4.25″ x 5.5″ and sprayed “Juniper Berry and Winter Wonderland” mica stains onto the panel. I dried it and then added water splatters and splatters of “Juniper Berry.” I used the “Threaded Snowflakes” embossing folder to add texture and then sanded off the color on the raised areas. I added stamping to the background using an older Tim Holtz music note red rubber stamp and “Hickory Smoke” Archival ink. Next, I used an older Waffle Flower “Ticket Frames” die to cut the panel and added foam tape to the middle section. After adding gold thread to the middle of the ticket panel, I adhered the pieces to an A2 card panel.

Moving on, I die cut two penguins, using the “Walter the Penguin” dies, from white card stock. I smooshed “Black Soot” Distress ink onto the largest pieces and then spritzed them with “Frozen Fog” mica spray. For the scarves and hat I spritzed the layers with the “Juniper Berry and Winter Wonderland” mica sprays and cut a few of the accent pieces from gold foiled cardstock. To keep within the parameters of the Color Throw Down Challenge, I used my E21 and 42 Copic markers to color the bills and feet a light neutral brown. Then I assembled both penguins adding the Santa hat to my boy penguin and a boy to the girl.

I used vellum to cut the shadow using the “Cozy Wishes” die and the sentiment from gold foiled cardstock. After adding the sentiment to my embossed panel. I snuggled up my penguins to make them “cozy”. It’s difficult to capture, but I used Nuvo “Morning Dew” Crystal Drops along the bottom of the penguins and added “Rock Candy” for a glittery snow vibe. Then I used the gold thread to add a bow and a large Trinity Stamps “Gorgeous Gold Baubles” to the center of the bow to finish the card.

Thank you for stopping by. Hopefully, this will jump start my creativity again. Until next time….. XOXO Marla.

Color Throwdown Challenge #767

Instagram – 1

Hello friends, it’s been a minute, hasn’t it? I plan to bring more content to my blog this month. I’ve just been a bit preoccupied with life and have had less time to create. The good news is that I woke up this morning and saw the Color Throwdown Challenge post and I was inspired to create a quick card. YAY!!!! I am posting the inspiration colors below, so that if you are inspired to play along you can. Just remember to use the hashtag #ctd767 when posting your links to social media.

Let’s jump into our card today. I am using a few older products from The Greetery, along with a new Spellbinders 3D embossing folder and Catherine Pooler inks. This color combination is just gorgeous so I couldn’t wait to get started on this card.

I used my Catherine Pooler swatches to choose colors that closely resembled the inspiration piece. I chose ink colors from the Spa Collection, which is a bit more muted. Then I placed a 4.25″ x 5.5″ piece of white cardstock into the corner of my stamping platform. I used the “Leaves All Around Stencil” from the Greetery to create the beautiful foliage above. For the first layer I used “Sage and Pink Champagne” ink, making sure to blend carefully with my brush because these colors can make brown. For my second layer I added “Glam and Pink Champagne” and finally I finished the third layer with “Mandarin Spice” Next, I used the coordinating “Leaves All Around Die” to cut out my image. Using the die, I cut a second piece from white cardstock to layer underneath for a little dimension.

Next, I pulled out the “Botanicuts Forget-Me-Nots” and “Mighty Oak” dies and cut several flowers and three acorns. I inked the Forget-Me-Nots in “Manderine Orange/Sage” and “Glam/Mandarine Orange/Sage.” For the acorns I added a base layer of “Buttercream” and added a touch of “Sand Castle to that. For the tops I used a combination of “Sand Castle” and S’mores” ink.

I auditioned many different colors of cardstock and nothing really stood out. I liked the white cardstock the best, but it was still too plain, so I decided to use an embossing folder for texture. I happened to have the new Spellbinders “Serenade of Autumn 3D embossing folder” on my desk and thought the leaves would be perfect as a backdrop. Using a piece of pearl shimmer cardstock, I ran it through my die cutting machine, adhered it to an A2 top folding card base and added my stenciled die cut. Perfection!

Before adhering my flowers and acorns, I wanted to cut out a bow for the top of my card. One of my favorite bows is from The Greetery, “Fit to be Tied.” I cut it twice from white cardstock. I inked one using the “Sage” ink and left the second white. I offset the two bows for more interest, added a foam dot to the center of the bow and adhered it to the top of my leaf clusters. To finish the card, I used the “Scripty Hello” die, again from The Greetery, to die cut the delicate hello, three times from white cardstock and the shadow from green velum. After adhering all of the hellos together, for dimension, I adhered it to the center of my card.

Instagram – 1

Finally, I glued all of the flowers and acorns around my leaf cluster to complete the card. Thank you for stopping by to take a peek at my card. I hope it inspires you to create something.

Until next time…. XOXO Marla

Give Thanks

The air has cooled, and the leaves are changing. OK, leaves aren’t changing where I live, but the temperatures have certainly cooled significantly. Finally, it is the perfect time to create fall cards. Today, I’m using new dies from the CottageCutz Fall release, which is nothing short of spectacular. Let’s take a look at the dies I used on my card today.

After cutting my images using the ” Fall Gate w/Flowers” die, I set out to do some Copic coloring. I wanted a strong pop of color, so I opted to color my gate red. I used R59,56,29 and 27. When I assembled the gate, I added 1/8″ foam tape to the accent pieces. The dimension is so eye catching.

I love that sunflowers have so many varieties and colors to choose from. Today, I selected the colors orange and yellow, because they would added a nice contrast against my red gate. I colored the centers in E29 and E25. For the petals, I began in the center and worked my way out using YR24, going over that with YR09 and finally blending in Y18. I colored all of the leaves using the same combination of YG95 and YG99. I used YG03, G24 with flicks of E55 on the grass.

The beautiful branch is part of the “Fall Branch w/Swing.” I repeated my color choices by using the same browns, greens and yellow/orange inks mentioned above. When I assembled the leaves, I changed up the number of leaves per branch to mimic the loss that would be occurring in fall.

Moving on to my background. I created grass, at the bottom of a 4.25″ x 5.5″ white card panel, using YG03, G28 and G24 Copic markers. Then I added Distress Oxide “Salvaged Patina” to the remaining white space. Next, I blended Distress Oxide “Peacock Feathers” around the outside edge. To finish the panel, I added Catherine Pooler’s “S’Mores” ink on the outside edge to frame my background. I used the same “S’more’s” ink to stamp my sentiment.

When I assembled my card, I considered leaving off the pumpkin. After adding foam tape to the sunflowers, I thought the card was pretty as is. After some thought, I settled on the addition of the pumpkin. I added foam tape to the back and adhered it to finish the card.

Thank you for joining me today. Until next time….. XOXO Marla

CottageCutz 2023 Christmas Release

Instagram – 1

I am so excited to share my first card creating with the new CottageCutz Christmas release. I have been anxiously awaiting this release that is a split between vintage and classic CottageCutz cute. I have so many ideas and wasn’t sure where I wanted to start, but eventual landed on the “Vintage Holiday Lantern.” I paired it up with some pattern paper in my stash to add non-traditional colors with an old fashioned flair and I think it worked. Let’s get started.

I die cut all of the pieces using white cardstock. Next, I colored them using Catherine Pooler inks as follows: Lantern, Cotton Candy with white gouache painted on top. Candle, Butter Cream and Sauna. Holly, Skylight and spattered with Spruce. Small leaf, Spruce. Ribbon (cut twice), Polished and Pebble. Twigs, Mocha. Berries, Polished and Cotton Candy. I added both water splatters and white gouache splatters to some of the pieces. For the bow, I used the white gouache with a paint brush to mute some of the color and add distressed interest.

When I assembled the lantern, I chose not to use the wick for the candle that is available, and I added vellum behind the first layer to mute the patterned paper from behind. I then added one more lantern layer behind the vellum for a little dimension.

To assemble the card, I began with a 4.25″ x 5.5″ white top folding card base. I used two pieces of patterned paper from the Prima “Christmas Market” 6×6 paper pad. The first was cut to 4″ x 5.25 and the second was cut to approximately 1.5″ x 5.25″ and hand torn on the right edge to add a distressed look. I then adhered the pieces to the center of the card panel.

I glued my finished lantern down to the right of center and arranged my foliage around the top ring of the lantern. I added a couple sprigs flowing down on the right side creating a visual triangle. I off set my gray and red bows using a small foam dot in between each piece for dimension. Finally, I added “Crystal” Stickles to the twigs and berries for added sparkle.

That completes this card. I hope my card inspires you to create something new today. The vintage pieces included in this release really warms my heart and I can’t wait to share more inspiration using these products on the CottageCutz YouTube Channel.

Until next time……XOXO Marla

One Craft Essential All Card Makers Need

Hello, friends. I am quickly checking in let you know that I have a three-part series over on my YouTube Channel featuring the use of alpha dies in card making.

I created three very different Halloween card using a new die set from Scrappy Tails Crafts called Purr-fect Halloween Night. This set is filled with several amazing dies to help you get your Halloween creep or cute on.

You can catch all of the videos here. Until next time…… XOXO Marla